

Context
Garry's Mod (GMod) is a sandbox game that draws all its strength from its community and its thousands of add-ons. Adding mods to your server lets you tailor your players' experience with new weapons, maps or game modes.
On your server hosted with Winheberg, the installation is mainly done through the Steam Workshop. Linking a Workshop collection to your server greatly simplifies administration, since the server downloads the mods straight from Steam on every startup. You can also add files manually for your own custom development.
A Workshop collection is the most reliable method to ensure that all your players run the same mod versions as the server.
Requirements
- An active Garry's Mod server on your Winheberg panel https://panel.winheberg.com
- A public Steam account with a ready Workshop collection
- The server must have been started at least once
1. Create a collection on the Steam Workshop
Head to the Garry's Mod Steam community page and create a new collection. Add every mod you want to run on your server.
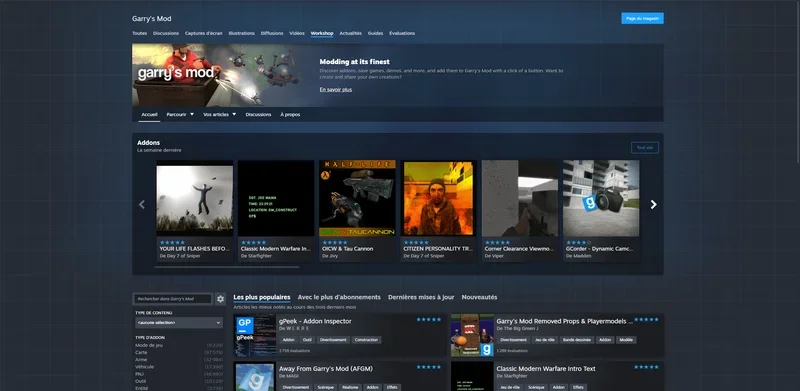
Once the collection is created, make sure to click the « Publish » button to make it visible. Then note the numeric identifier (ID) of your collection, found in the page URL.

2. Configure the server on the Winheberg panel
Log in to your Winheberg gaming panel at https://panel.winheberg.com and select your Garry's Mod server. Navigate to the startup configuration section (Startup tab).
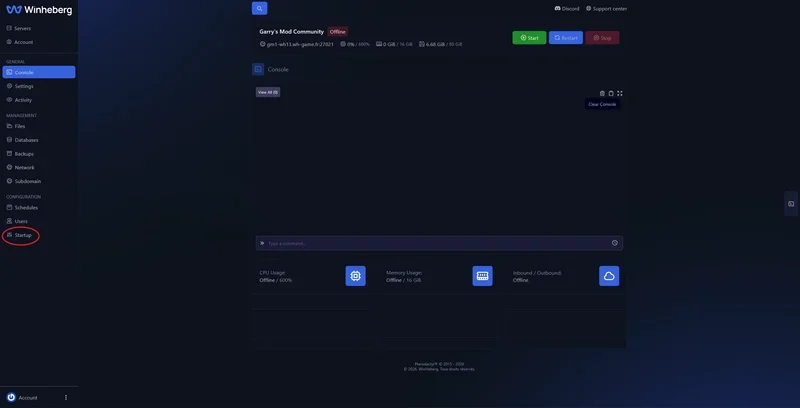
The Startup tab holds the variables read by the server at launch. Fill in the field below with your Steam collection identifier.
| Setting | Value to enter |
|---|---|
| Workshop Collection ID | The numeric identifier of your Steam collection |
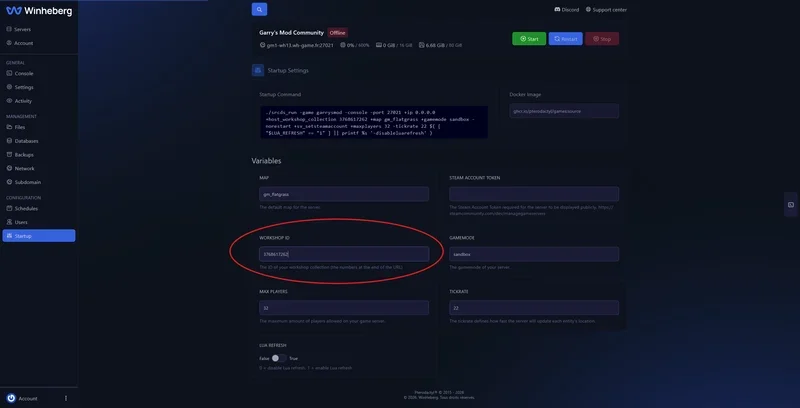
Once this information is filled in, go back to the main page and restart your server. The console will show the download of each add-on from your collection.
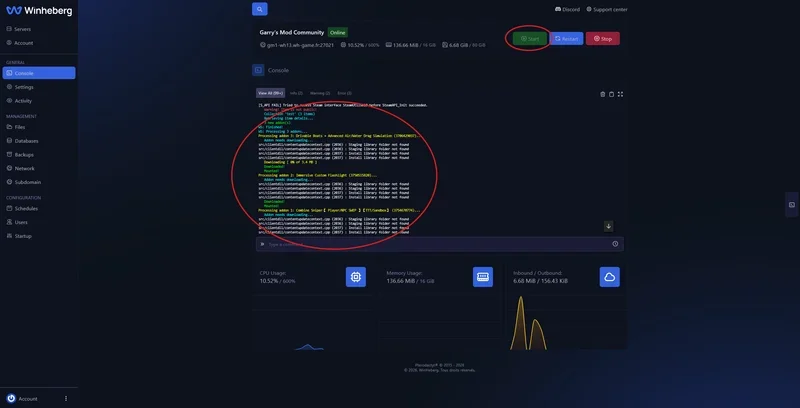
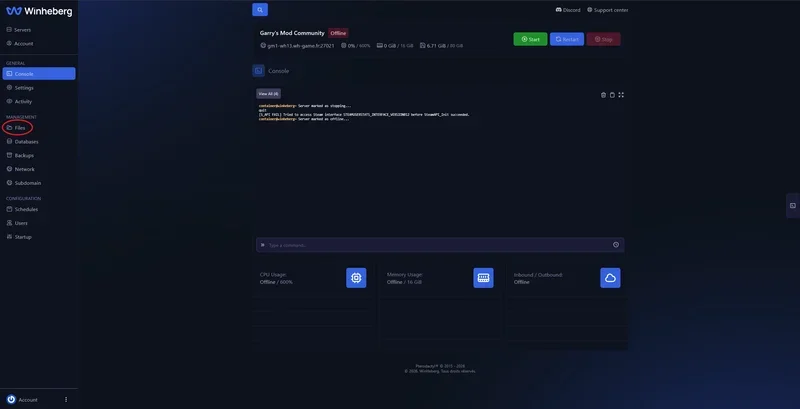
As you can see in the console, the mods were downloaded successfully.
3. Alternative with manual installation via SFTP
If you own custom mods or ones bought on third-party platforms, manual installation becomes necessary.
Connect to your server files with an SFTP client such as FileZilla or WinSCP. The connection credentials are found in the Settings tab of your server.
They are grouped in the SFTP Details section, outlined in red (hidden here for privacy reasons).
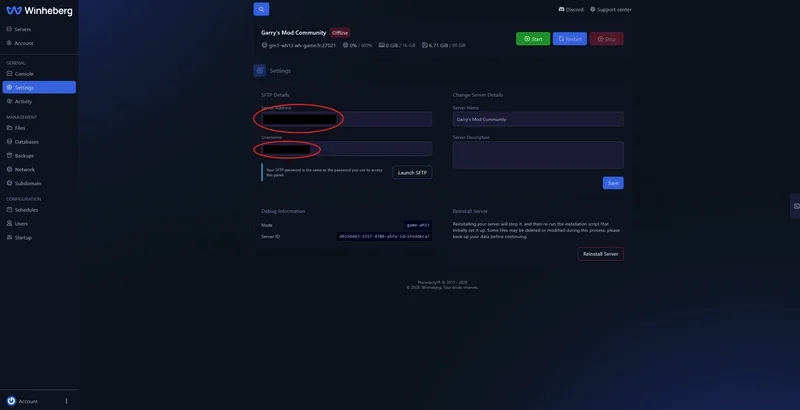
Your SFTP password is the same as the one you use to log in to the panel.
Then connect with this information. Navigate to your server's root directory, open the garrysmod folder then enter the addons subfolder. Drag and drop your mod folder directly into this location, then restart the server from the Winheberg panel to apply the changes.

Your mod folder must contain the right subfolders (lua, models, materials) and above all a valid addon.json or addon.txt file at its root. A wrong structure will prevent the mod from loading.
Troubleshooting
❌ The server does not download the Workshop mods
The console shows no add-on download on startup.
- Check that your Workshop collection is set to public mode
- Confirm that the collection ID you entered matches the one in the URL
- Make sure you restarted the server from the panel
❌ The manually installed mod does not appear
The add-on copied over SFTP has no effect in game.
- Check that the folder is not compressed (zip or rar format) before uploading it
- Verify the internal structure of the folder (
lua,models,materials) - Make sure a valid
addon.jsonoraddon.txtfile sits at the root - Restart the server after adding the files
❌ Players see giant « ERROR » signs or pink textures
The content shows up but some models or textures are missing.
- Confirm that the mod in question does not require additional content to install
- Ask your players to verify the integrity of their game files on Steam
- Check in the server console that the add-on was properly downloaded
Best practices
- Avoid adding hundreds of mods so you do not lengthen your players' connection time
- Always read a mod's description on the Workshop to check its dependencies
- Remove obsolete mods or those that generate errors in the server console
- Group your custom scripts into a single add-on folder when possible to optimise loading
- Keep track of your mod identifiers to make maintaining your collection easier
Need help?
If your mods refuse to load despite these checks, our support team is available. Open a ticket from your client area https://billing.winheberg.com by selecting the Technique department, then fill in your Garry's Mod server in the Related Product field.
Enjoy your customised Garry's Mod server. 🎮