Context
An overhaul is not a modlet. Darkness Falls, Undead Legacy, Rebirth or War3zuk AIO replace whole parts of the game, progression, items, zombies, sometimes the maps, and ship compiled code. They impose four constraints that small mods do not, anti cheat disabled, an identical install on every player's machine, often a precise game version, and noticeably more memory.
Most failed installs come from the third point. An overhaul follows 7 Days to Die updates with a delay, sometimes months, and until it catches up your server has to stay on the game version it supports. This guide takes the problem in order, from the Winheberg game panel.
Requirements
- An active 7 Days to Die server on the Winheberg game panel, with at least 12 GB of memory, overhauls use far more than the base game
- The overhaul's server package, downloaded from the mod's official page, not a repack found elsewhere
- An SFTP client if the archive is larger than 100 MB, or the direct download link for the Upload from URL option
- Your players warned, they will have an install to do on their side
Never install two overhauls at the same time, they step on each other and the server no longer starts. One overhaul, and a fresh game.
1. Check the game version the overhaul requires
The overhaul's download page always states the version of 7 Days to Die it is built for. It is the first thing to read, even before downloading.
| The overhaul announces | What to do |
|---|---|
| The current stable version of the game | Nothing, your server is already on the right version |
| The experimental version | Pin the server to latest_experimental |
An earlier version, for example a v2.x branch |
Pin the server to that branch, see step 2 |
The exact branch name is the one shown in Steam, right click the game, Properties, Betas tab. The dedicated server uses the same branch names as the game.
2. Pin the server to the right branch
This step only applies to overhauls that are not up to date with the stable version.
- Open the Startup tab of the panel
- In the Beta Branch field, type the branch name, for example
latest_experimental - Leave Auto Update enabled, it keeps the server up to date within that branch
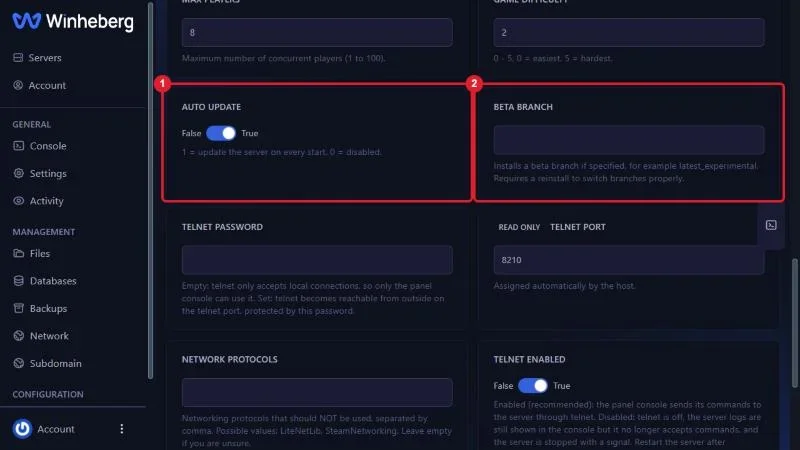
As the field itself says, switching branches requires a reinstall so that the game files match. Make a backup first at step 3, then run Reinstall Server from the Settings tab. Your configuration files and saves are kept, but a prior backup remains the rule.
3. Back up and stop
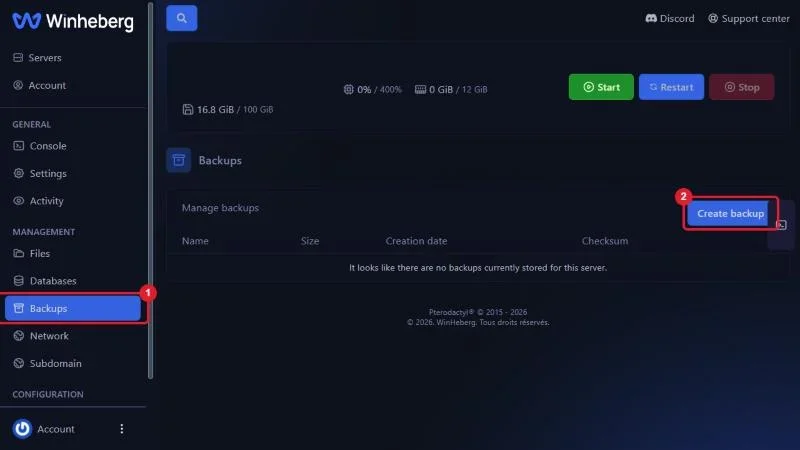
Open the Backups tab and click Create backup. An overhaul makes the old game unplayable, this backup is your only way back.
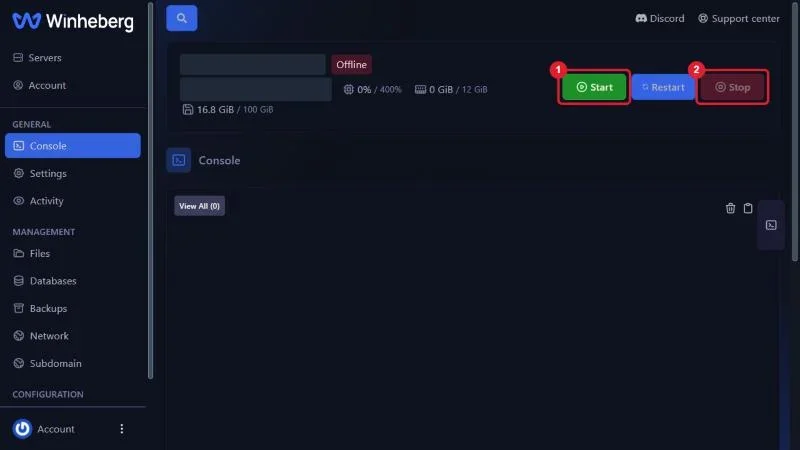
Then, in the Console tab, click Stop and wait for the Offline state.
4. Install the server package into Mods
An overhaul ships as a set of mod folders, sometimes ten of them, to drop directly into Mods. Open the Files tab, enter Mods, then click Upload.
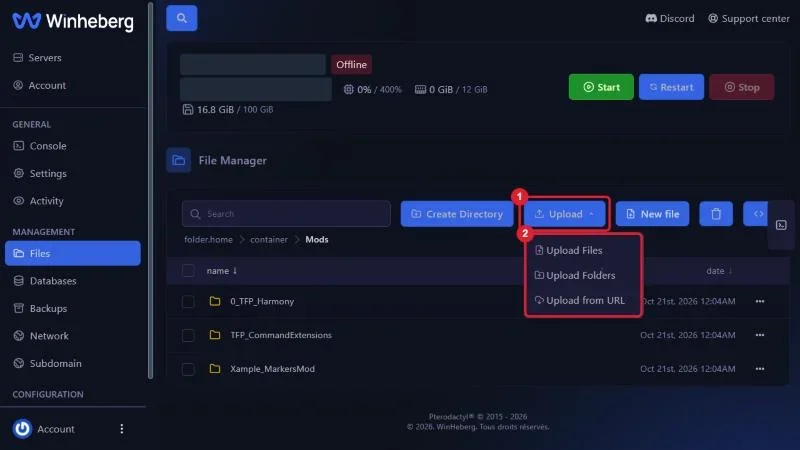
- Upload from URL is the most comfortable option for an archive of several hundred MB, the server downloads it itself
- Upload Files suits a smaller archive, then Unarchive from the ⋯ menu of the row
- Beyond 100 MB without a direct link, use SFTP
After extraction, every folder of the overhaul must sit directly under Mods, with its ModInfo.xml at the root, next to the three official folders 0_TFP_Harmony, TFP_CommandExtensions and Xample_MarkersMod that must not be deleted.
Mods/
├── 0_TFP_Harmony/
├── TFP_CommandExtensions/
├── Xample_MarkersMod/
├── 0-MyOverhaulCore/
├── 1-MyOverhaulContent/
└── 2-MyOverhaulMaps/
If extraction produced an intermediate folder, for example Mods/MyOverhaul-Server/0-MyOverhaulCore/, move all folders up one level. The game only looks one level below Mods. The details of that check are in How to Install Mods on a 7 Days to Die Server
5. Disable EAC and start a fresh game
Open serverconfig.xml at the server root, find EACEnabled and set the value to false.
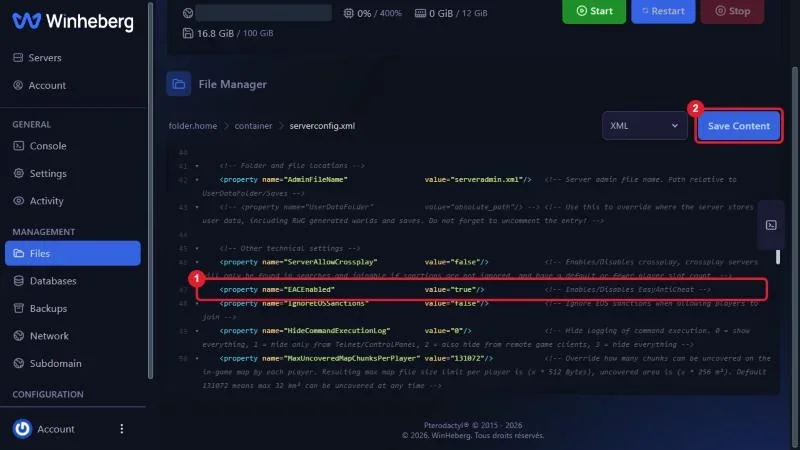
In the World section of the same file, give a new GameName. An overhaul does not graft onto an existing game, and a different name keeps the old save intact on disk.
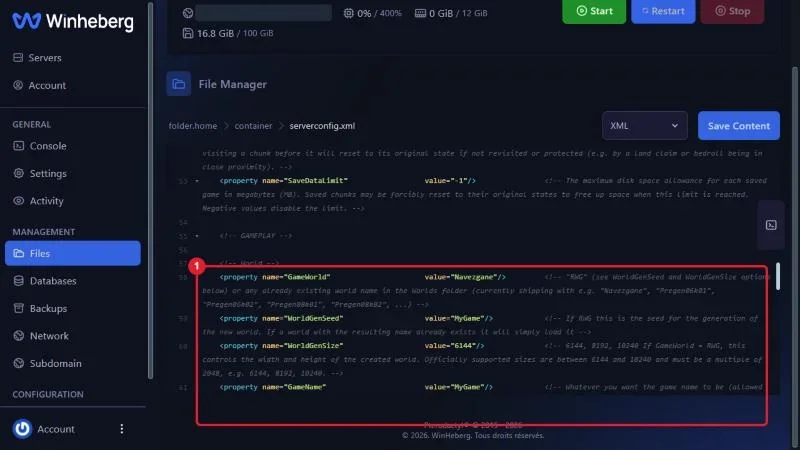
Some overhauls ship their own maps. In that case their documentation gives the GameWorld value to use, and the map folder must be present in the mod's files. Save with Save Content.
6. Start and check
Go back to the Console tab and click Start. The first start is long, the overhaul loads its assets and often generates a map, let it finish without restarting.
During the startup sequence, the server lists the mods it loads. Every folder of the overhaul must appear there. If a folder is missing or a Harmony error shows up, go back to step 4.
7. On the players' side
This is the step everyone forgets, and without it nobody connects.
- Download the overhaul's client package, in the same version as the server, and install it following the mod's documentation
- If the server is pinned to a branch, choose the same one in Steam, right click the game, Properties, Betas tab
- Launch the game with the Launch game without EAC option, see How to Disable EAC on a 7 Days to Die Server
- Join the server by its address
Troubleshooting
❌ Players get an incompatible version error
- The client and the server are not on the same Steam branch, compare the versions shown in the game's main menu and in the server console
- After a branch change, the server must have been reinstalled, otherwise it still runs the old files
❌ The server no longer starts since the install
- Check that the uploaded archive is the server package, the client package contains useless files here and may lack some folders
- Check the folder structure, one intermediate folder under
Modsis enough to block everything - Reread the version required by the overhaul, a mod built for another game version crashes on load
- Watch the memory in the Console tab, a hard stop during loading with memory at the maximum means the plan is too small
❌ The overhaul's world does not load
- Check the
GameWorldvalue, it must match exactly the name of the map folder shipped by the mod - Confirm that this folder is present in the uploaded files, some overhauls ship maps in a separate archive
❌ Harmony errors show up in the console
- Confirm that
0_TFP_Harmonyis still present inMods - Check that you did not leave an old compiled mod next to the overhaul
Best practices
- One overhaul per server, and no other compiled mod until you have confirmed everything works
- Plan generously on memory, 12 GB for a small group, 24 GB and more beyond ten players, overhauls load far more content than the base game
- Pin the branch and disable Auto Update if the overhaul is fragile to minor updates, then update yourself once the mod has caught up
- Keep the exact archive you installed, your players will need to get the same version
- Test the connection with a single player before announcing the opening
- Combine a server without EAC with a whitelist, it is the counterpart of the lost protection
Need help
If the server refuses to start after the install or if your players are refused despite an identical configuration on both sides, open a ticket with our support from your client area, Technical department, with the server involved in the Related Product field and the name and version of the overhaul. Our team can go through the startup logs with you.
Your server no longer looks anything like the base game, that was the point. 🧟